We know that it’s hard to believe, but it's true: Some people just don’t want to hear from you. How can this be? Don't they know how popular you are? Alas, when you send out a text or broadcast campaign at CallFire, you are required to offer such people the option of not being contacted again. Let's learn more about how the all-important Do Not Contact list at CallFire works.
- Jump to Section
- Industry and Legal Standards
- How Do Not Contact Works
- Managing Your Do Not Contact List
- CallFire's Universal Do Not Text List
Industry and Legal Standards
Voice and Text broadcast campaigns at CallFire have different requirements for complying with legal and industry standards when it comes to Do Not Contact. Here's a brief overview.
Voice Broadcast Campaigns
Depending upon the purpose of your call and the nature of your organization, the law most likely requires you to offer a Do Not Call option to those who are contacted in your Voice Broadcast campaigns. There are very strict guidelines and potential large penalties for not complying with these requirements. There are also penalties for calling those who have told you they no longer wish to be called, or who are part of the National Do Not Call registry. More information about these requirements can be found at https://www.donotcall.gov.

Text Broadcast Campaigns
As described in the Keywords section of this help documentation, there are strict rules you must follow when you contact people in mass by text. These rules are set by CTIA – The Wireless Association, formerly known as the Cellular Telecommunications & Internet Association. All carriers, including CallFire, agree to abide by these regulations, and we require that our customers do so as well.

Through CTIA, carriers provide short codes — five- and six-digit numbers — that are shortened versions of traditional phone numbers. These short codes make text communications much faster and easier. In addition, CallFire and other carriers agree to offer receivers of text messages the chance to “opt out” of receiving future text messages. Businesses like yours, who use the mass texting services of carriers such as CallFire, must follow these practices to use our Text Broadcast product.
How Do Not Contact Works at CallFire
As you create and conduct your campaigns, you will have people who will tell you that they do not want to be contacted by you in the future. Here is how they relay this desire to you.
Voice Broadcast campaigns
When you use CallFire’s system to place automated phone calls for you, the Do Not Call feature is automatically enabled for you. This is because you must offer people who receive your call the option of not being called by you again.
As seen in the graphic below, the Do Not Call option is located in the lower-right corner of the Voice Broadcast - Sounds page, also known as the Sounds tab.
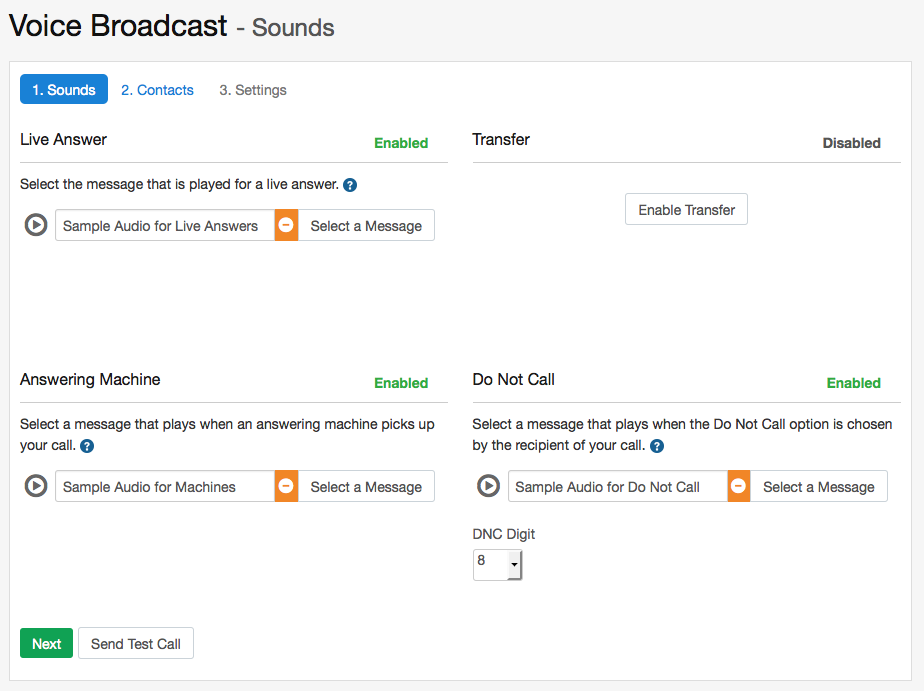
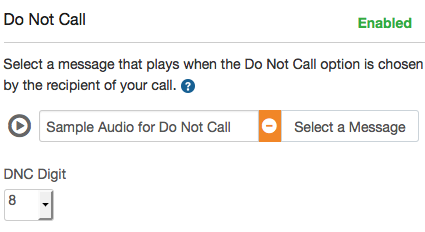
Let's take a closer look at this Do Not Call box (see below). Its "Enabled" status can be seen in the upper-right corner. Below that is the Select a Message button, where you select a message that you have previously recorded, or record a new one that offers the option of being added to the Do Not Contact list. This is the message users will hear when they press the digit to be added to the Do Not Call list. Next, you see a pulldown menu, which allows you to select the digit on their telephone that people will press to be added to this list. Most businesses designate "8" for this purpose. More information on how to set up your Do Not Call message can be found on the Do Not Call page of the Voice Broadcast section.
Text Broadcast Campaigns
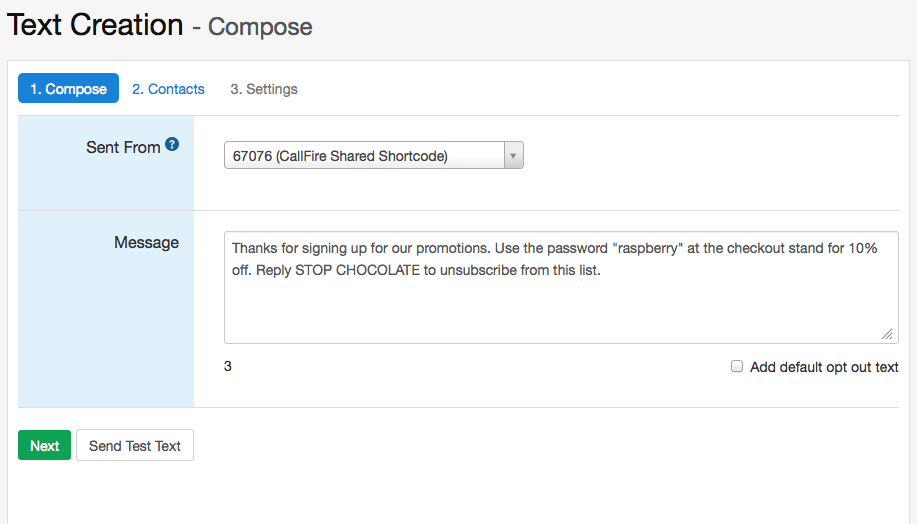
By law, anyone who receives an automated text message from you, or who responds to any advertisement of yours via a shared CallFire short code and your individual keyword, must be given the option of "opting out" of any future messages from you. You do this by setting up an auto-reply in advance of sending out your original message. When someone messages you, CallFire sends them this auto-reply message, which includes any promotional information you want to include, as well as instructions on how to stop future text messages from you. As shown below, you set up this auto-reply via the Auto Reply Creation - Compose Step page, also known as the Compose Step tab. You may enter a personal opt out message, or check the box to include a generic set of instructions. More information on how to do this can be found at the Providing an Opt out page of this help document.
Managing Your Do Not Contact List
Okay, so you are contacting people, whether by text or voice campaigns, and they indicate that they don't want to hear from you again. So, you may be thinking, how do I keep all of this straight? Am I constantly going to have to pore through lists and compare numbers?
Fortunately, CallFire makes this process really easy for you, because our system receives the feedback from people who don't want to be contacted again and maintains a list of such responses. When you later start or resume a campaign, our system automatically compares, or "validates", the list you are using in your current campaign against this Do Not Contact list. If you are attempting to contact someone who is on this DNC list, the system alerts you and gives you options for resolving the conflict.
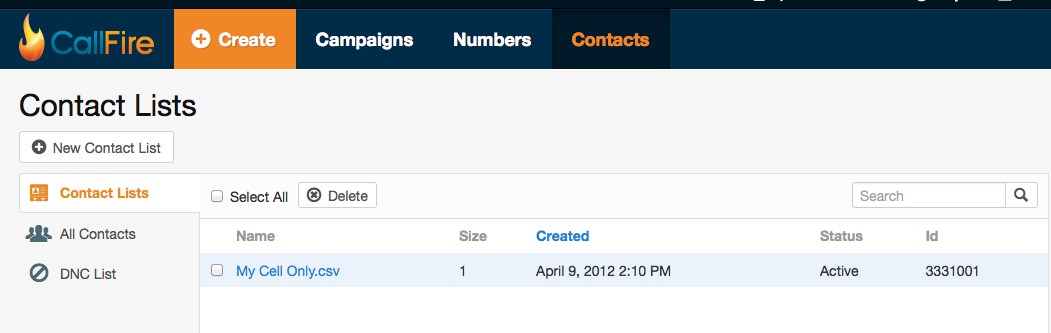
To access your Do Not Contact list, click on CONTACTS in the top navigation bar of your CallFire page. When you do so, you arrive at the Contact Lists screen. Please click on DNC List in the left column.
This takes you to the Do Not Contact List screen. There, you'll see a list of numbers that indicated that they desire not to be contacted again. From left to right, the columns indicate the phone number; the type of campaign they prefer you not use to contact them in the future; the date and time they made this decision; and the particular campaign which prompted them to make this choice.
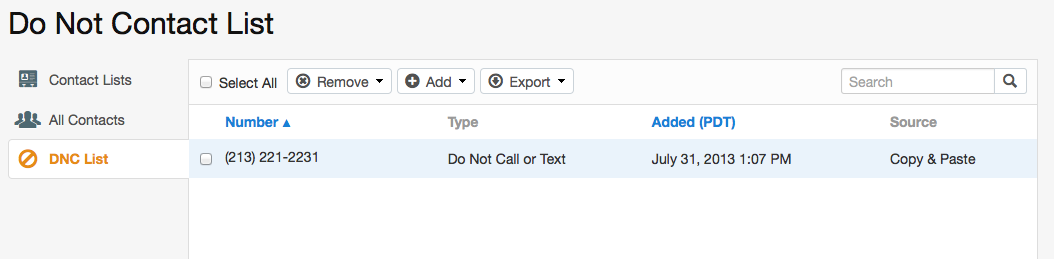
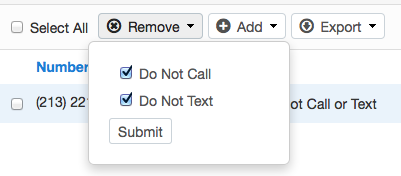
Now, let's briefly look at the pulldown menus above the columns. First, there is the Remove pulldown menu, which allows you to remove a number in the list from either your Do Not Call (Voice Broadcast) or Do Not Text (Text Broadcast and Keyword campaigns) categories. First, you'll want to check the box to the left of the numbers you wish to remove, then check the appropriate boxes in the pulldown menu, as shown below, and then click the Submit button.
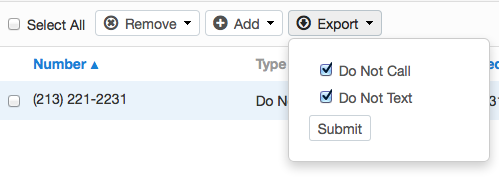
The next pulldown to the right is the Export function, which is a really convenient, neat feature! Just select either your Do Not Call for Do Not Text contacts (or both) in the pulldown, click on the Submit button, and magically — Voila! — the list(s) are downloaded to your computer's hard drive. You'll be able to access them using either Excel or a comma-separated value (CSV) program, such as Notepad or TextEdit.
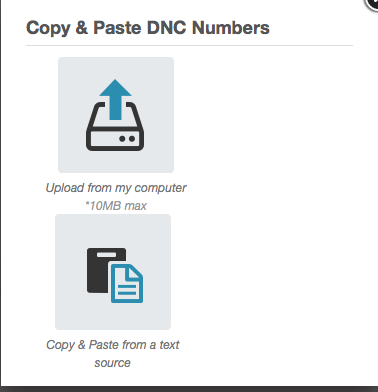
Finally, there is the Add pulldown, which allows you to manually add numbers to your Do Not Call or Do Not Text lists (or both). Just check the appropriate box(es) and click the Submit button.
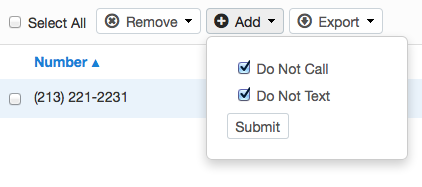
Next, you'll see a pop-up box giving you the option of Uploading these numbers from your computer, or copy and pasting them from an Excel or comma-separated value (CSV) file. Choose your option, and follow the instructions!
CallFire's Universal Do Not Text List
Another time- and money-saving feature for our customers is CallFire's Universal Do Not Text list.
At CallFire, we sometimes receive text messages to one of our shared short codes that include words such as "stop," "end," or "opt out." If our system is unable to determine a specific CallFire customer for whom this message might have been intended, it assumes that someone is telling us that they do not want to receive texts from any of our customers. Thus, that phone number is added to our Universal Do Not Text list.
When you create or resume a Text Broadcast campaign, our system "scrubs," or compares your list of contacts (phone numbers) to your personal Do Not Contact list. At the same time, it scrubs your list against CallFire's Universal Do Not Text list as well, ensuring that you aren't wasting money on texting people who don't want to hear from you.