The Do Not Call option is used to comply with the strict rules and regulations governing how people use automated dialing services, which are thoroughly explained in other parts of our Help section. CallFire strongly recommends that our users familiarize themselves with these regulations before using our Voice Broadcast product.
- Jump to Section
- The Do Not Call box
The Do Not Call box
The Do Not Call Function is automatically enabled for you.
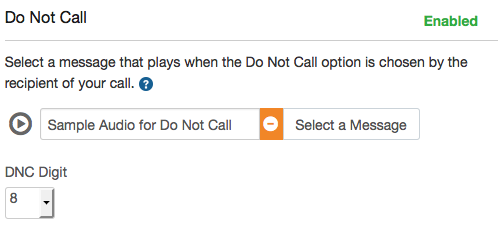
If the Do Not Call option is enabled, then the Live Answer message should indicate the digit a person can press to be placed on your Do Not Call list, if so desired. As seen above, this number is designated by selecting a number from the DNC Digit pulldown menu and is set to 8 by default.
Next, you’ll want to select or create a message that plays if the designated Do Not Call digit is pressed. In the message, you should acknowledge their choice and assure them that they have been indeed placed on the list.
So let’s select or create that message by clicking the Select a Message button!
As seen below, the same type of pop-up box that you’ve encountered in other sections appears.
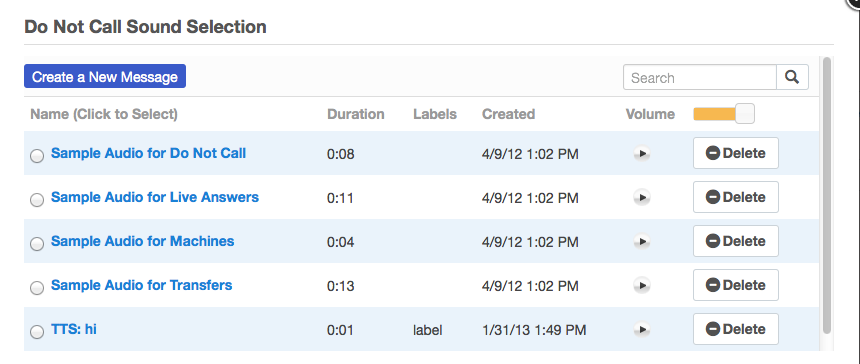
Please follow the same steps described for Live Answer, Answering Machine, or Transfer Message to select or create your message for your Do Not Call acknowlegement message. If you click the Create Message button, and need help with any of the three options for doing so, please refer to the Creating Messages section of this help document.
As before, once your message has been created you will be returned to the Voice Broadcast – Sounds page. Here, you’ll find that your just-recorded message appears in the Select a Message pulldown box. When you are finished adding and configuring sounds, click the green Next button at the bottom to move on to the Contacts tab.