Do you use a hosted-CRM application? Do you use CallFire’s Cloud Call Center? If your answer is “Yes” to both of these questions, your agents might benefit from a link to your CRM platform directly within the CallFire Agent Popup screen.
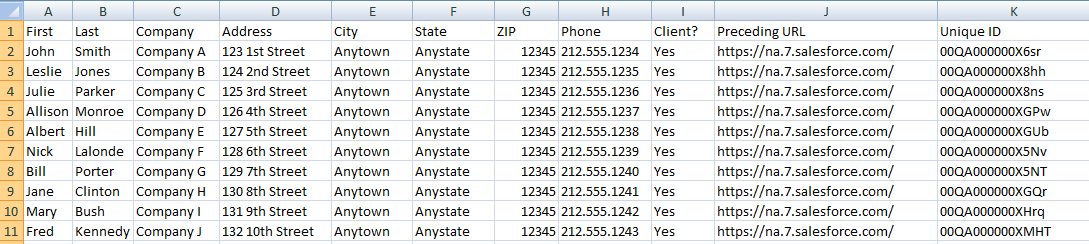
Export the data from your web-based CRM that you would like to see in your CallFire agent screen. This can include names, addresses, etc. If you are unsure how to do this, search for “Exporting records to Excel” in your web-based CRM’s FAQ or Help section.
Each CRM assigns a random unique ID to each record. Be sure to include the unique ID for each record as one of the items you export.
Once you have exported the list to Excel, you must turn each row into a unique URL.
To do this, copy-paste the piece of the URL that precedes the individual’s unique ID (in most cases, this should be the same URL each time) in a blank field in Excel. In the example below, the preceding URL will be https://na7.salesforce.com/.

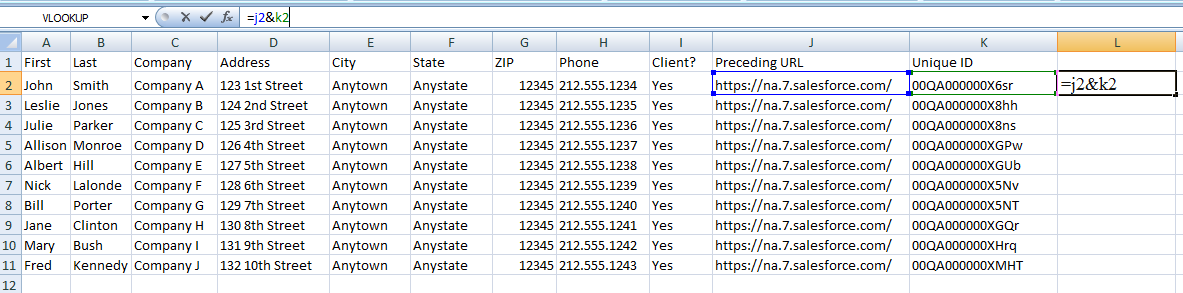
In the example below, we have pasted the static preceding URL into column J, just before the unique ID in column K. If you don’t have a blank column before the unique IDs, you will need to create one. Your Excel spreadsheet should look something like the one below: a column of preceding URLs, followed by a column of unique IDs, followed by a blank column.
Click in the blank row to the right of the first set of records, and type the command =(x2&y2), where x is the column containing the preceding URLs, y is the column containing the unique IDs, and the number is the row number. Then hit enter. In our example, this command is =(j2&k2). This will combine the items in each of those columns.
Next, click the first combined URL cell, place the mouse in the cell’s lower right corner, click and hold your mouse button while you pull the mouse downward to the last record. This will combine all your records so that each one will have its own URL.
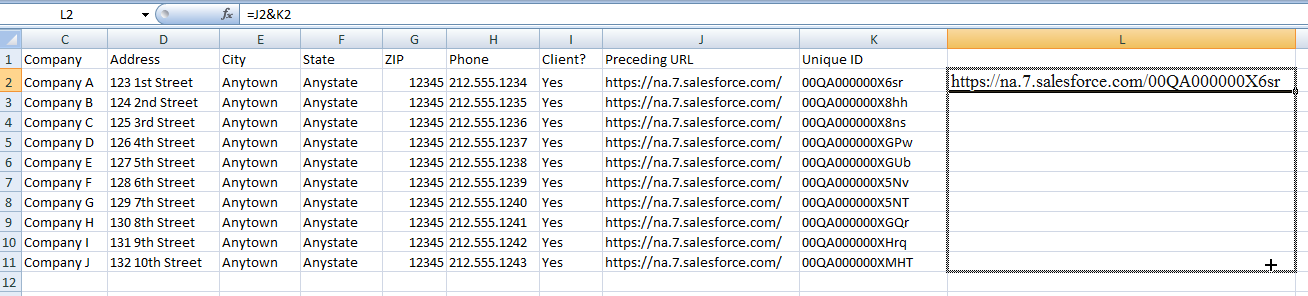
Now that you have combined the preceding URL with the unique ID, copy the combined URL column (column L in our example) and paste special (values) into a new column. You cannot simply delete the other two columns without the paste special.

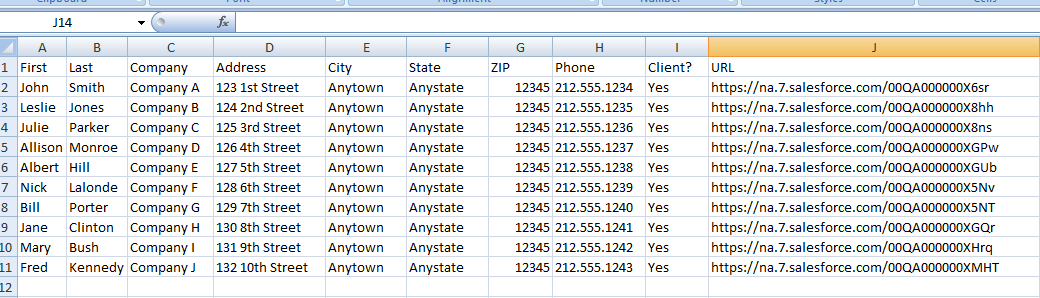
You can now delete the other three columns. Upload the list to an existing Cloud Call Center campaign. Before making phone calls, make sure that you have already logged into your web-based CRM account. This will prevent the link1 tab from taking over the CallFire agent interface when you click on it.
Once you start making calls within the Agent screen in CallFire, it will look something like this:
